Appearance
Creating Digital Products
Digital products are downloadable items such as e-books, software, music, or templates that customers receive electronically after purchase. FluentCart provides a streamlined process for setting up these products, including managing their digital assets and pricing.
Steps to Create a New Digital Product
From your WordPress dashboard, navigate to FluentCart Pro > Products in the left WordPress sidebar.
On the Products screen, click the "Add Product" button at the top right.
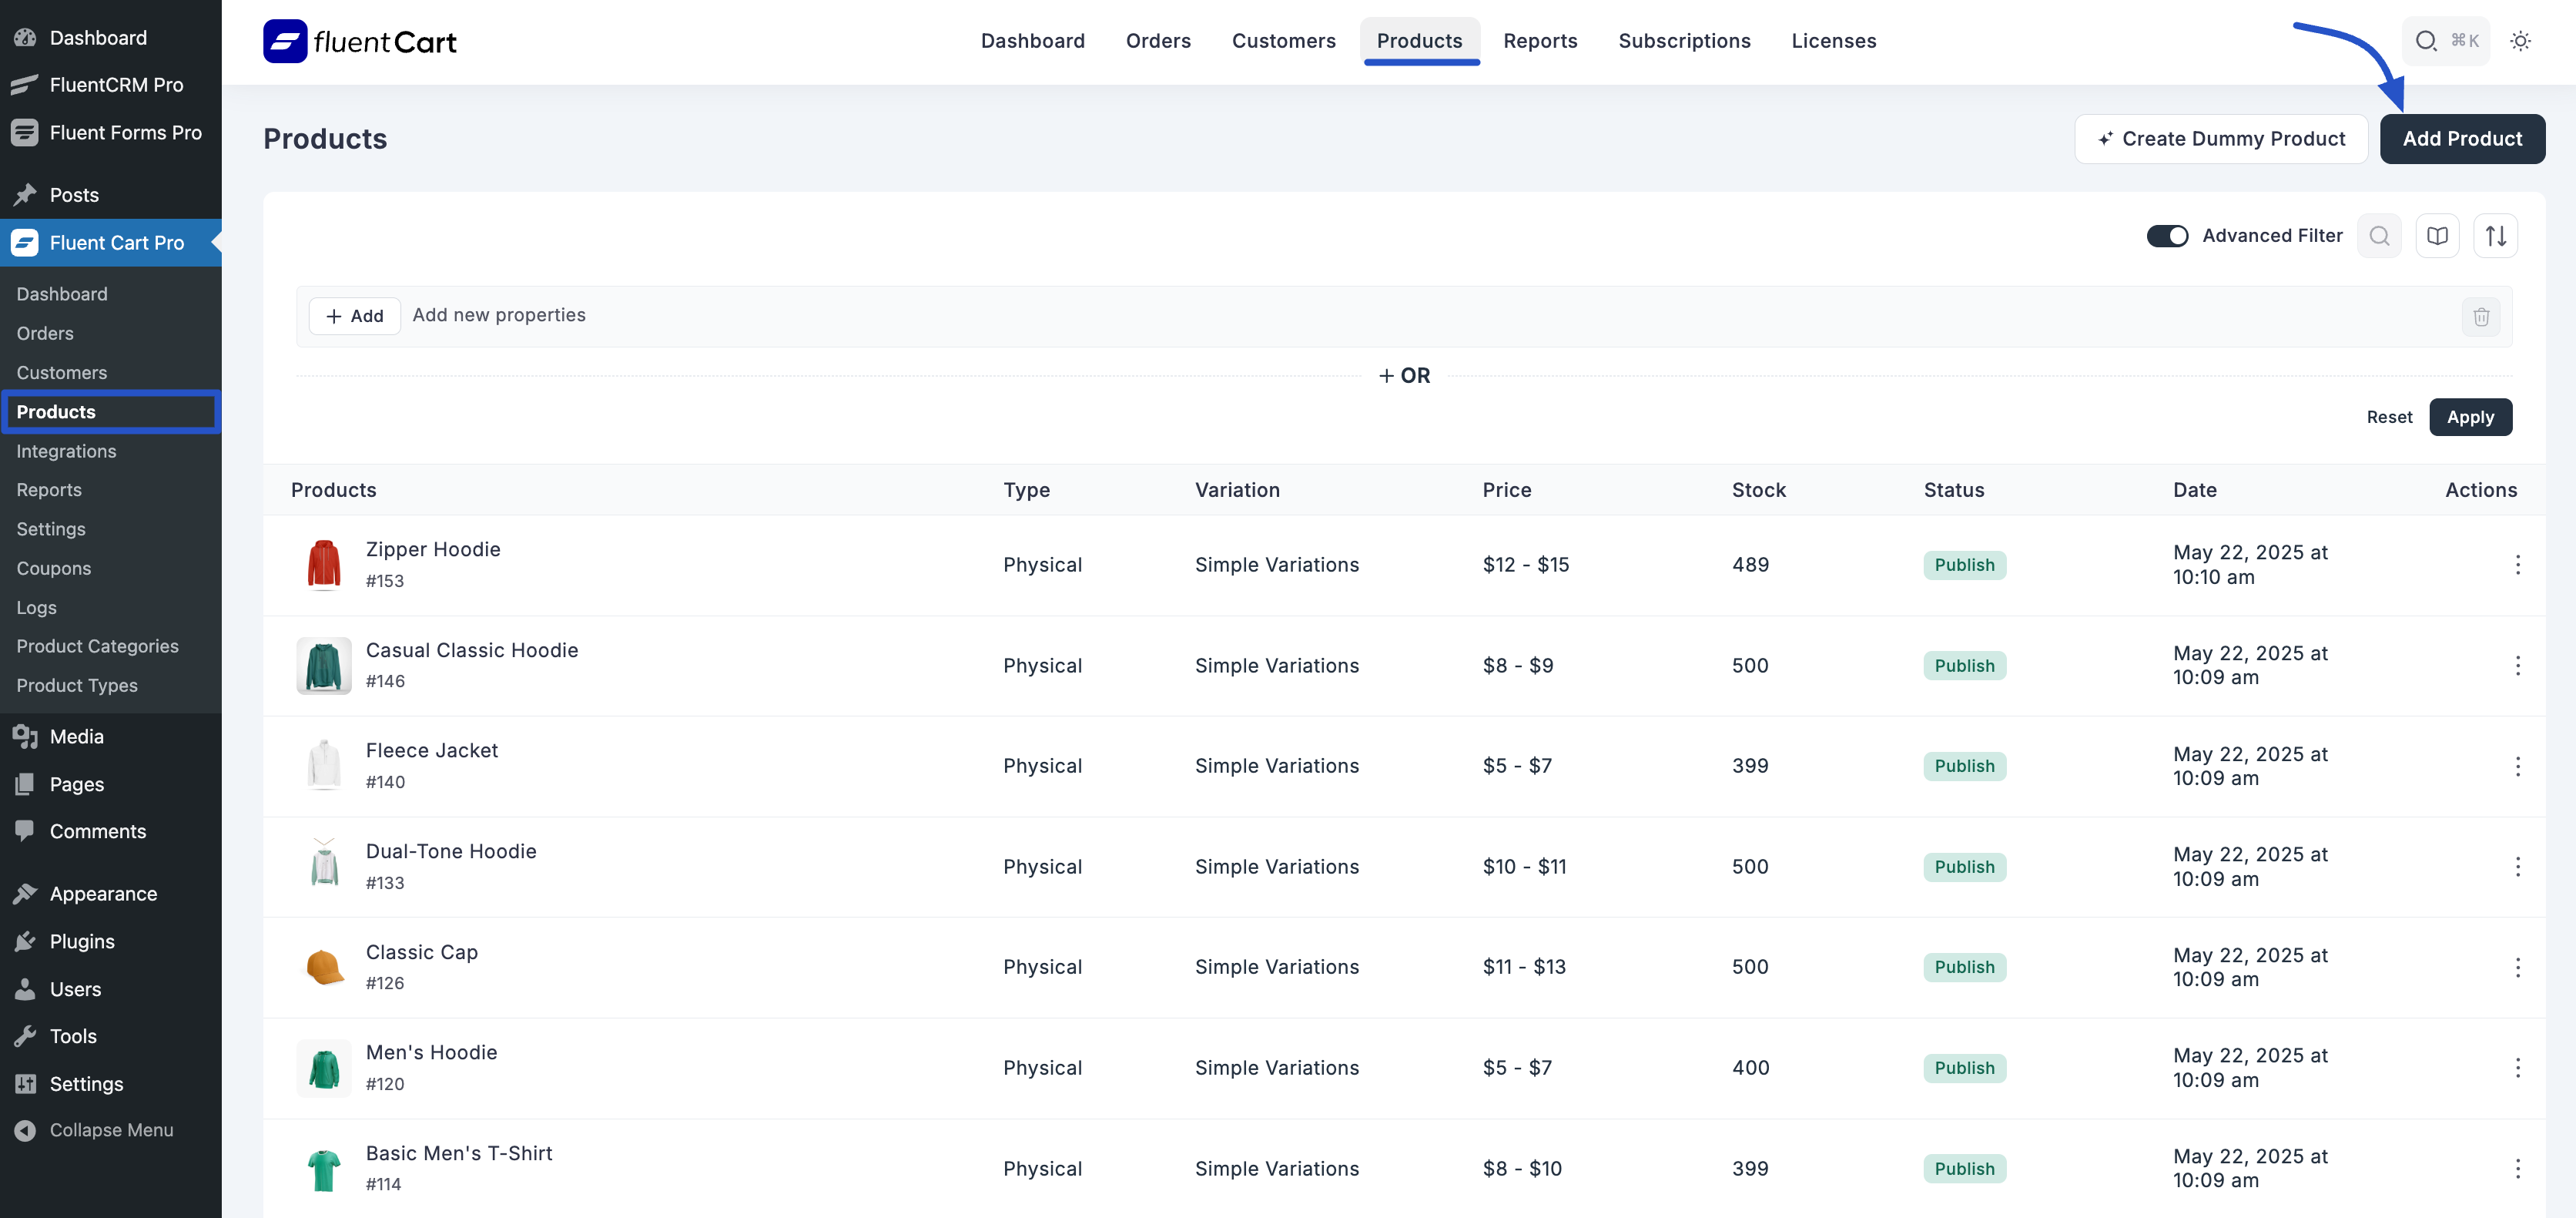
This will open the Add New Product popup from where you have to give the product name and select the product type Digital Product then the Edit Product page will come.
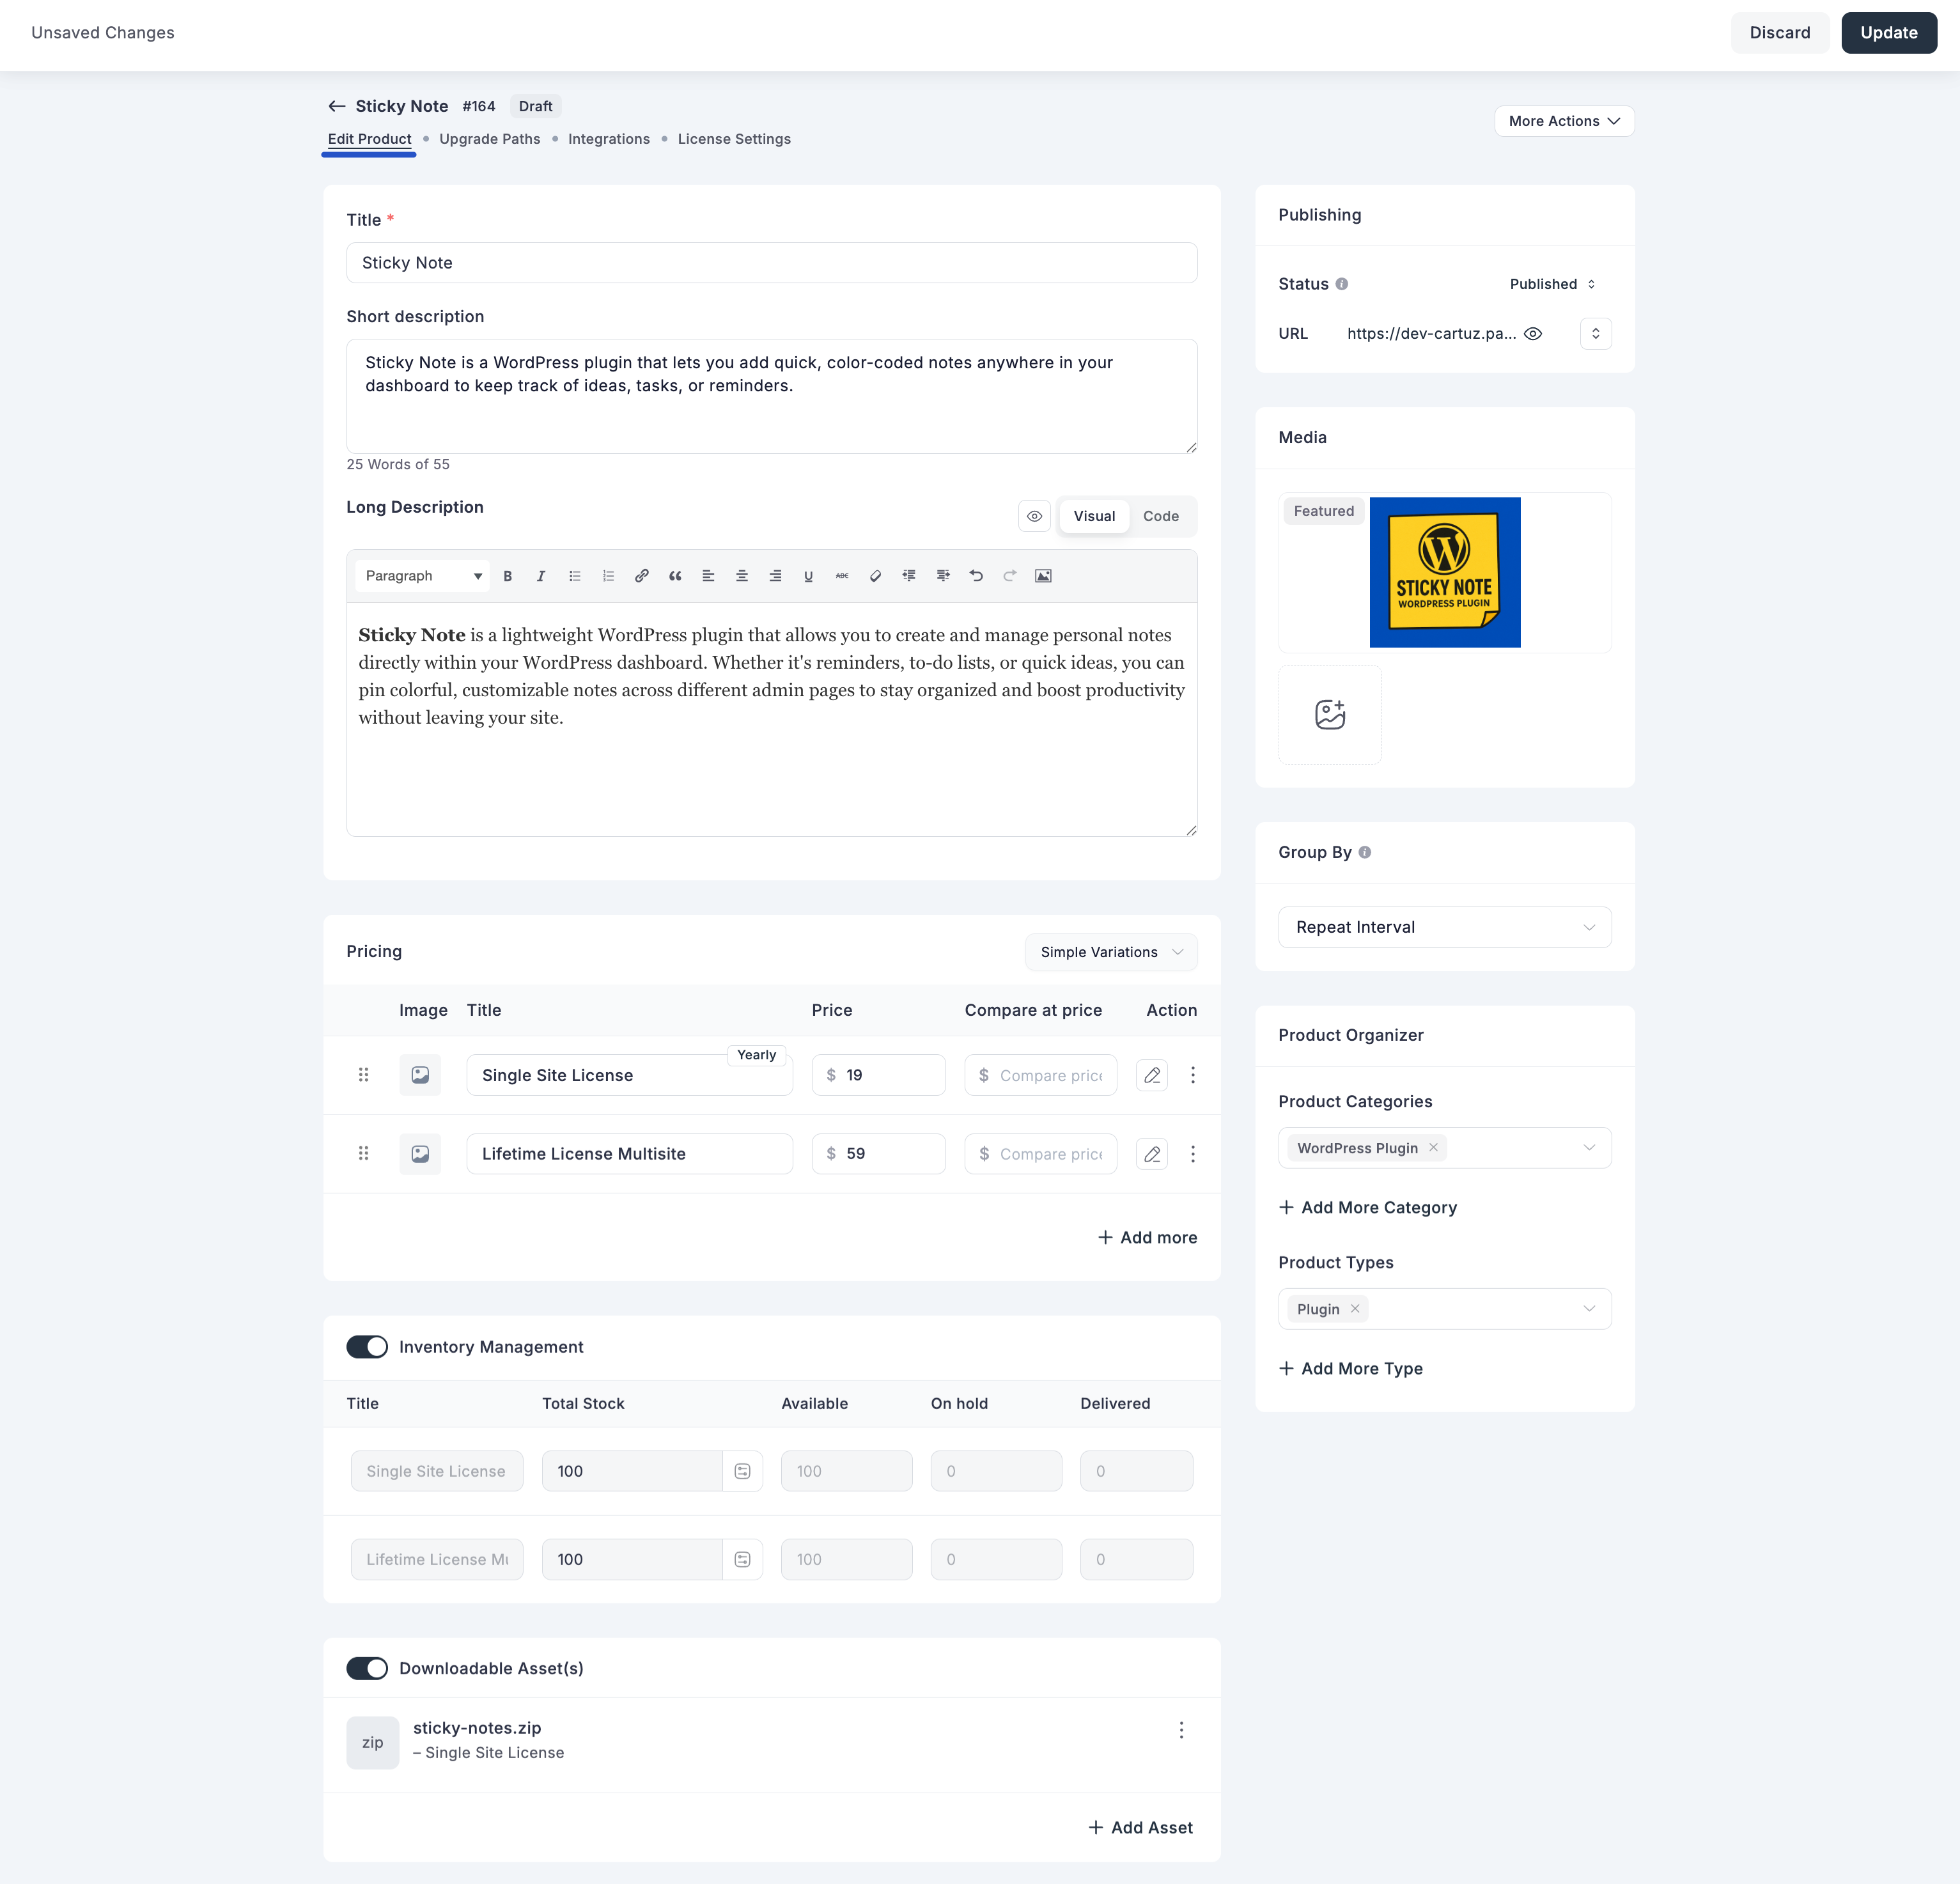
1. Basic Product Information
- Title: Enter the main name of your digital product (e.g., "E-Book: Mastering FluentCart").
- Short description: Provide a brief, concise summary of the digital product.
- Long Description: Use the rich text editor to write a detailed description of your product, including its benefits and content.
2. Media
- Featured Image: Set a prominent image for your digital product (e.g., e-book cover, software icon).
- Add Media: Upload additional images or videos to showcase your product.
3. Product Organizer
Categorize and type your digital product for better organization.
- Product Categories:
- Assign the product to relevant categories (e.g., "E-Books", "Software"). Click "+ Add More Category" to assign additional categories.
- Product Types:
- Assign the product to one or more relevant product types. Ensure "Digital" is selected or added here. Click "+ Add More Type" to assign additional types.
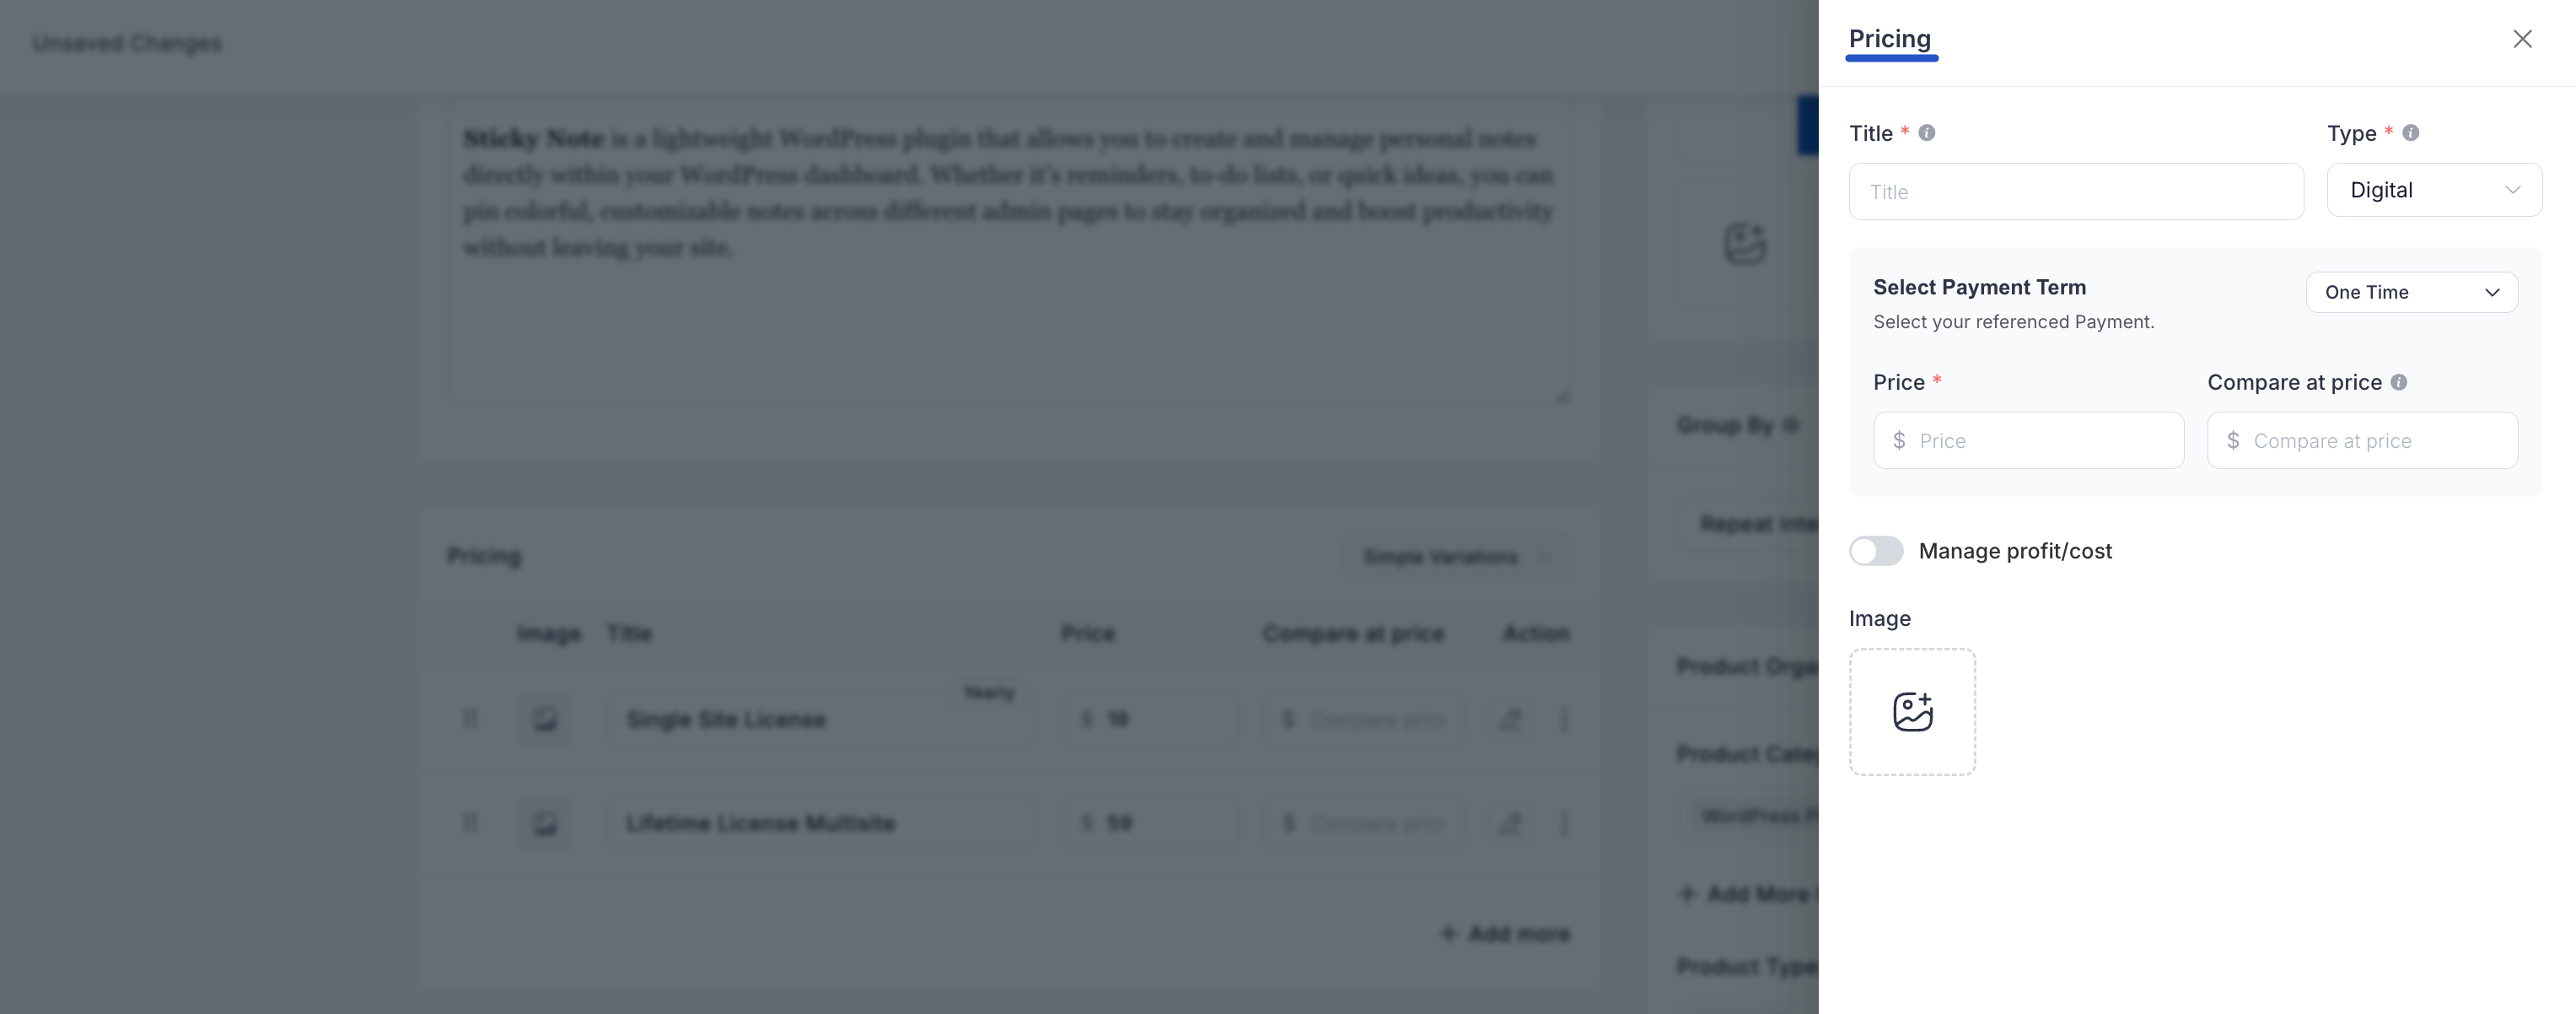
4. Select Payment Term
This section will show the “One-time” type payment option. You can also choose the “Subscription” based payment type, depending on your needs, from the dropdown option.
One-Time Payment
- Type Selection: When configuring product variations, ensure "Digital" is selected as the product type within the pricing modal for your variants.
- "Select Payment Term": This will show "One Time" as the option for digital products.
- Price: Set the selling price for this digital product variant.
- Compare at price: (Optional) Enter a higher price that will be displayed as a strike-through price.
- Manage Profit/Cost: Enter the "Cost per item" (if applicable, e.g., licensing fees you pay for components) to calculate Profit and Margin for this digital variant.
Subscription
Set the selling price for the subscription base.
Interval: Set the interval based on the subscription: daily, weekly, monthly, or yearly.
Enable Installment payment: If you have an installment charge for your digital product, then check this checkbox. After that, set the installment count and total price.
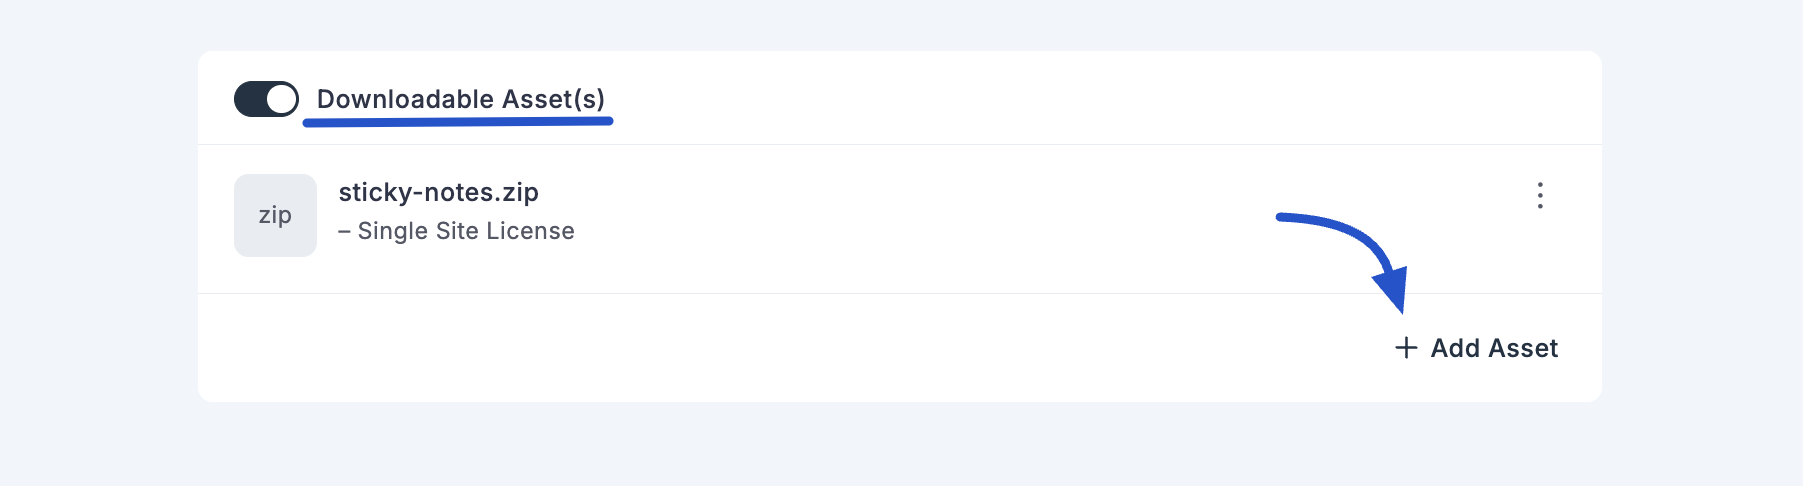
5. Downloadable Asset(s)
This crucial section is where you manage the actual digital files customers will receive.
Initially, you'll see a list of any previously added assets.
Click "+ Add Asset" to upload or link a new downloadable file.
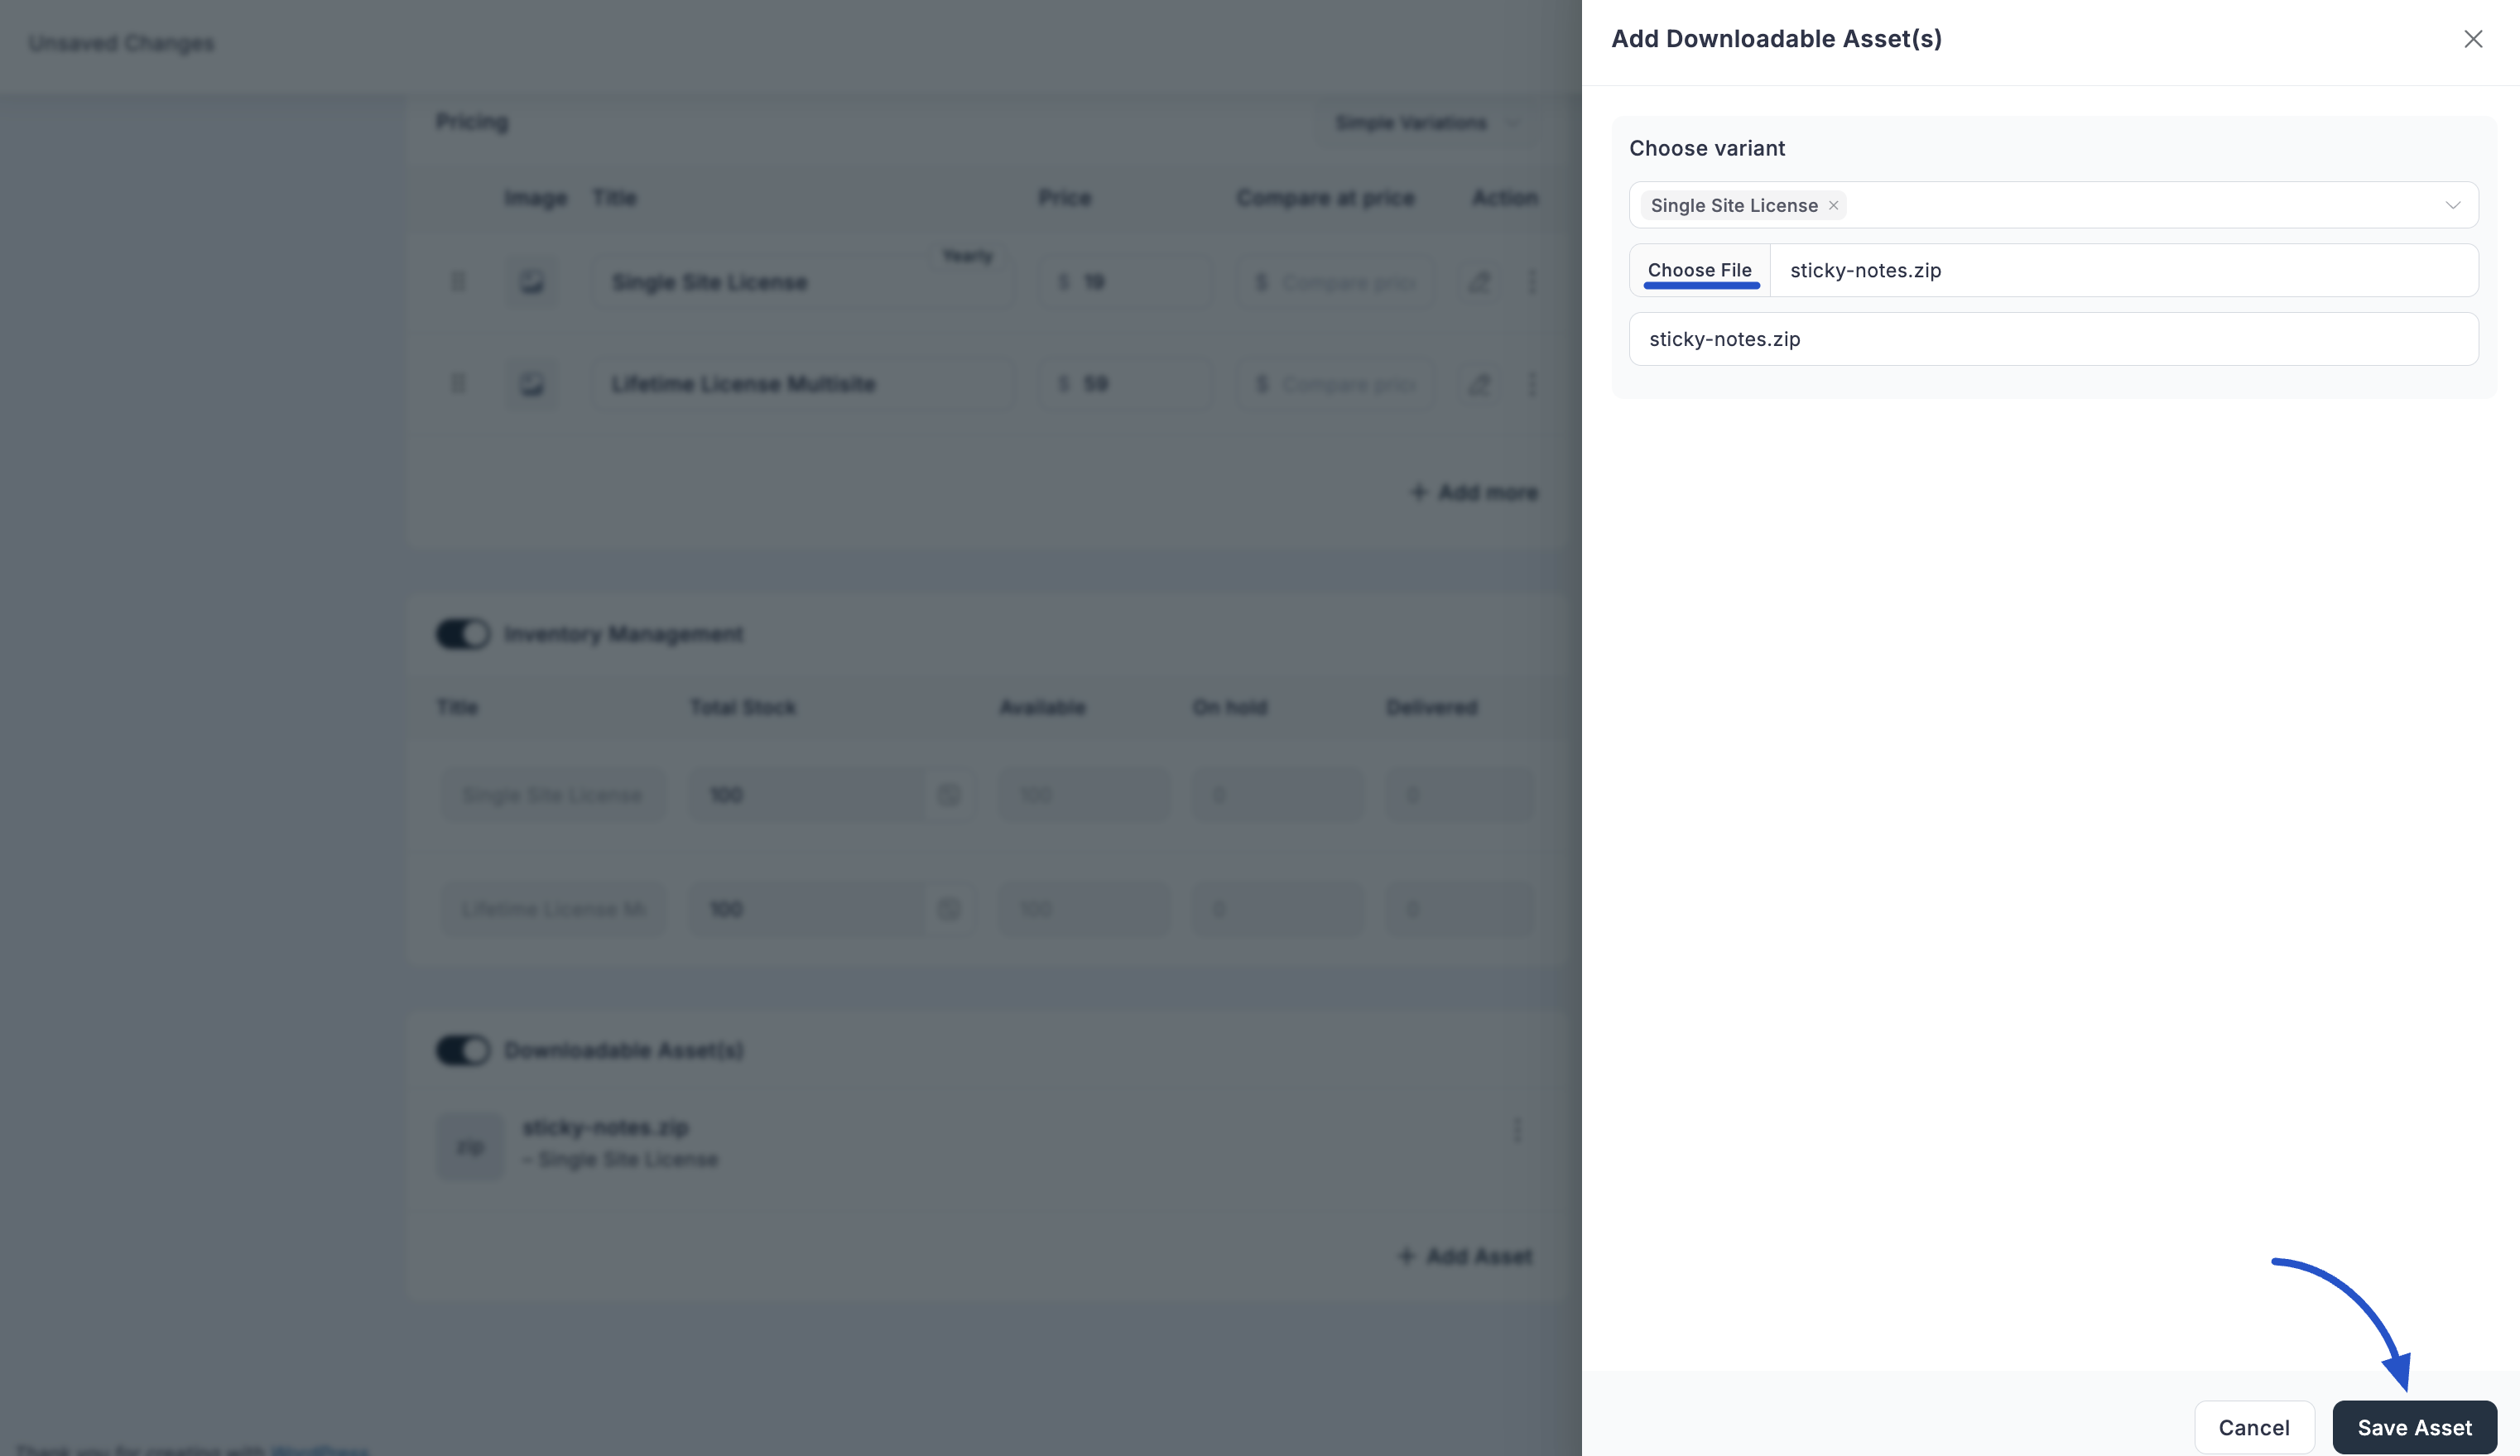
An "Add Downloadable Asset(s)" modal will appear.
- Choose variant: (Optional) If your digital product has multiple variations, you can select which specific variant(s) this asset applies to. Leave empty for all variants.
- Choose File: Click this button to upload a file from your local computer or select from existing files in your FluentCart storage.
- This will open a "Storage Drivers" modal, showing options like Local storage (drag & drop or browse) or S3 (if configured).
- File URL: (Alternative) Provide a URL if your digital asset is hosted externally.
- File Name: Enter a display name for the downloaded file. You can edit this file name after upload if needed.
- Click "Save Asset" to add the file to your product.
Important Note: Subscription Products
The "Add Items" modal when editing orders currently does not support adding subscription products. Subscription orders must be initiated as such.
Publishing Your Digital Product
Once you have configured all the necessary details:
- Set the Status to "Published" in the "Publishing" section.
- Click the "Update" (or "Save") button on the top right to make your digital product live in your store.